RAKAMAN REALAUDIO FAIL
| This page will provide you a basic guide to create a simple RealAudio
format files, it's quite useful nowadays since this format (RealAudio) is
becoming the "standard" in delivering audio on Internet (either it's a
live streaming or not).
The basic requirement needed are:
The reason I choose walkman as an audio source device in this page is simply because it's not expensive compared with the dedicated tuner or even a Hi-Fi set. It helps a lot if you can get the walkman with the Auto-Reverse feature, because if you're planning to record some speech and plan to transfer it into RealAudio format, this will enable you to record the whole cassette's contents into a single file without need to turn the tape from side A to side B - save time. You can get the Audio cable from any general electric store. The price varies from cheap (around RM$ 5.00 to more than RM$ 20.00 depend on the quality of the cable and the point (some expensive one with gold-plated point).
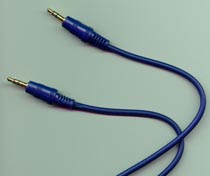 fig 1: Audio Cable Getting Started Situation: I want to transfer a speech from cassette/tape form into RealAudio format and publish it on the Internet. First, connect the Audio cable into the Line-out/ear-phone jack (port) on your walkman - this is the input or audio source, and connect it to you Computer sound-card's Line-in jack (port)
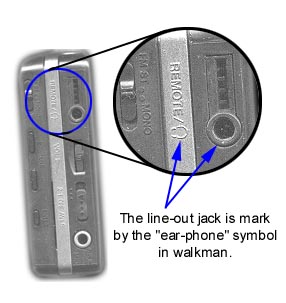 fig 2: Line-out/ear-phone jack (port) on walkman So, now the main connection is from your walkman's ear-phone port to the sound-card's Line-In port. Then start your Cool Edit 96 program. The Cool Edit 96 program will looks like this:
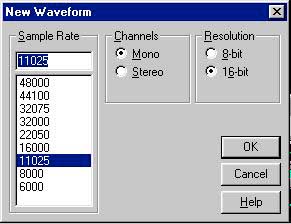
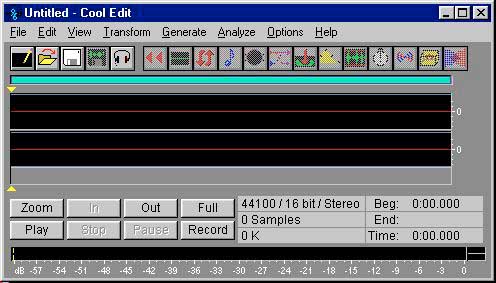 fig 3: A blank Cool Edit 96 looks. In CoolEdit 96, create a new file by clicking File and then New, a window will appear on screen which enable you to select your desired audio compression/quality.
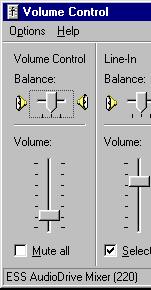
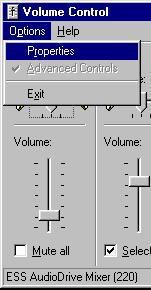
In this case (a speech), I would choose 11Khz 16bit Mono, since it didn't contains any music in my source cassette/tape, 11Khz Mono is good enough for voice [ my own opinion ]. Afterthat, check your system's recording volume level - double-click the speaker icon on the Windows 95/98 Task Bar, a "Volume Control" window will appear. Choose File then Properties.
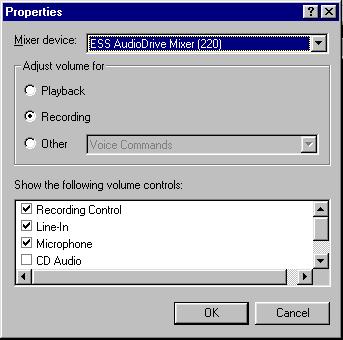
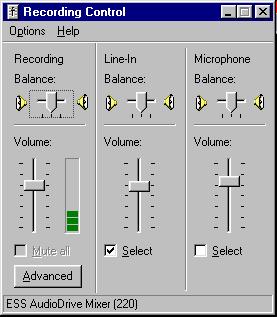
And then, in the Properties window, under "Adjust volume for" - choose the "Recording". You can select which recording source that you want to be displayed here, in this case make sure the "Line-In" is selected as the source for audio input. After you click "OK", the Recording Control window will appear, set the level for Recording Line-In to 3/4, and same goes to the Recording Volume Level. Another thing to check here is your Walkman's Volume level, just set the level to 8/10 or just put it full, since we can control the level from the recording volume window.
Now we are ready to test the Audio Input Level, press the Play button on Walkman to start playing the cassette/tape, you should be able to hear the voice coming out through your Computer's speaker - this mean the connection is correct. If you don't hear anything, a few possibility are, the connection is wrong - make sure it's from ear-phone to Line-in, your sound-card faultly/misconfigured, the volume level is zero, etc. Try to find the optimum level of the contents, if quite difficult, just set the Recording Volume level to middle or lower the highest peak (as long as it didn't exceed the maximum peak level - indicated by RED colour on bar beside the recording volume level) because you can modify the digitized audio later using CoolEdit 96. You can also do a test-record using CoolEdit 96 by pressing the "record" button on CoolEdit 96 window, to monitor the recording level in CoolEdit 96 - click on "option" and then click on "Monitor VU level". you should be able to see the level at the bottom line of the CoolEdit 96 windows. Press the "stop" button to stop the recording and to check on the audio Waveform, adjust the recording volume and re-test the recording to achieve the best recording level. After finish setting up the level, then you're ready to use CoolEdit 96.
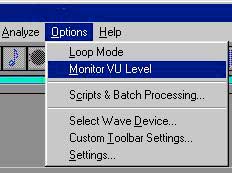 fig 11: Monitor the VU Level
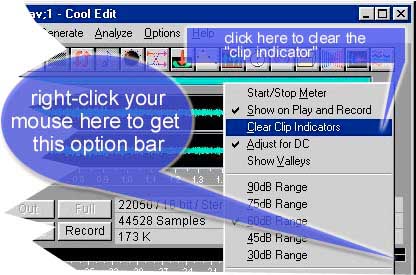 fig 12: To clear the VU Level Using CoolEdit 96 To clear up the test recording audio that we did just now, just press Control-A (to select the entire wave audio) and press "Del" key. Rewind the tape and start the recording process by pressing "play" on the walkman and "record" on the CoolEdit 96. If you have an auto-reverse walkman, you don't have to turn the tape from side A to side B, since it'll do it automatically for you. You can roughly know how long it'll take just by knowing the tape capacity, normal tape is 60 minutes, other is 90 minutes, so, you just have to wait until the recording finish. Just don't leave the Computer too long (exceeding the recording time - 60 or 90 minutes) because although when the tape finish, the recording is still not finish, you have to press "Stop" to stop the recording, or it'll eat up your harddisk space. After finish the recording process, you can save the file first for the pre-caution (just in case), and then decide whether your digitized speech is good enough or not, if not, like it didn't fully occuppied the Waveform space, you can just select the part that you want to modify, then choose "Transform" -> "Amplitute" and then "Amplify" to amplify the selection (make it louder).
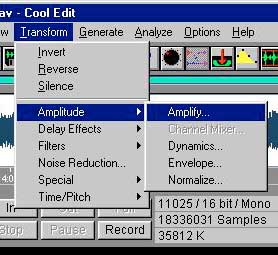 fig 13: Amplify the selection
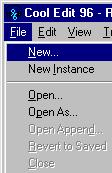
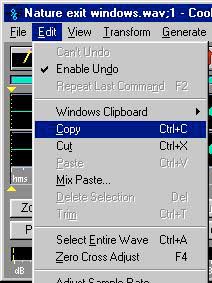
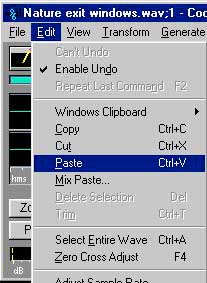
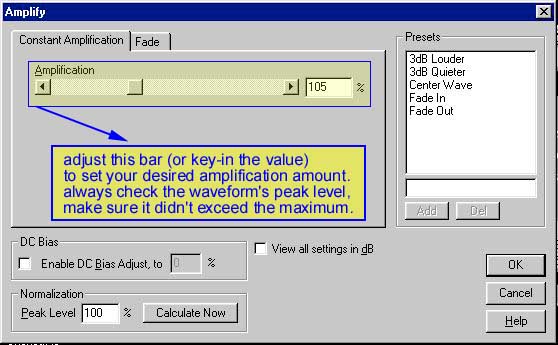 fig 14: Amplify window If you plan to divide the digitized audio into a few part, let say 10 minutes per part, just select from the waveform and do a "Copy", then go to "file" and create a "new instance" (a new window with the same setting) and "paste" the selection in the new windows. To make your selection more accurate, you can use the ZOOM features by clicking the "IN" or "OUT" button.
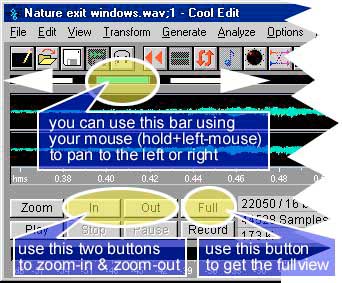 fig 18: the ZOOM and panning After satisfy with all the output, and save all the files, then we can proceed with the final part. Moving to RealAudio Format Close the CoolEdit windows and start the RealAudio Encoder 3.1 (since the CoolEdit won't release some of the space that it use for a buffer if it's still active - plus it takes up some of the Computer resources like memory). Below is how the RealAudio Encoder looks like.
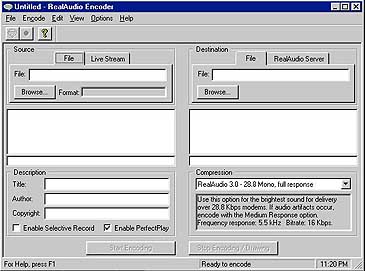 fig 19: RealAudio Encoder 3.1 Under "Source" section, click on the "Browse" button, get the WAV fie that you've just created using the CoolEdit just now, and click "Open" to load the file - or if you know the exact path and filename, you can just enter it into the "file" entry and press "enter" key when done. Then, Under "Destination" section, by default it will carry the original source WAV name and put the "ra" extension into it, but you can rename it into other name. Under "Description" section, you can type in the "title", "author" and the "copyright" of the audio file. You can enable the "selective record" if you want to, this will allow RealPlayer Plus user to record some clips from your realaudio file (if I'm not mistaken). Finally, you have to decide on the "Compression", the available compression for RealAudio Encoder 3.1 are:
Normally I would go for "RA 5.0 8.5 kbps Voice" or "RA 5.0 6.5 kbps Voice" for speech and "RA 3.0 - 28.8 Mono medium response" for a radio kind of stuff (Music + voice). Then click the "Start Encoding" button to start doing the Encoding process. The End ?? I will try improve and add-in more stuff on this later, till now, good luck and happy encoding. ... one more thing..please excuse my english - will try to find someone to check on the grammar. E-Mail me if you have any question regarding this page, I'll see what I can do. A few example of a LIVE broadcast using RealAudio are TIME Highway Radio, RTM and a few more sites. |

© Copyright A.Hukum 1998, All rights reserved.